Getting Started
This page covers everything you need before sending your first invoice to KSeF - Dolibarr prerequisites, KSeF portal setup, module installation, and the configuration walkthrough.
On This Page
Before you Begin
Install Dolibarr
If you don't already have Dolibarr running, you'll need to set it up first. We won't cover the full installation and basic setup here since it's well documented elsewhere, but here are some good starting points:
Dolibarr Official Website
Dolibarr Wiki: Installation and Upgrade
TechRepublic: How to Install Dolibarr on Ubuntu Server
Video by Wasz Informatyk
Dolibarr Official video tutorials
We have tested the module on Dolibarr v22.0.3 and v23.0.1 internally, and will continue to maintain the module for as long as our business exists since we use it ourselves. In the event we go out of business, the code is open-source so others can fork and continue to maintain the codebase in the future.
It requires PHP 7.4 or higher with OpenSSL, cURL, DOM, mbstring, JSON, and Zip extensions enabled. Most standard PHP installations already include these.
Enable the Required Dolibarr Modules
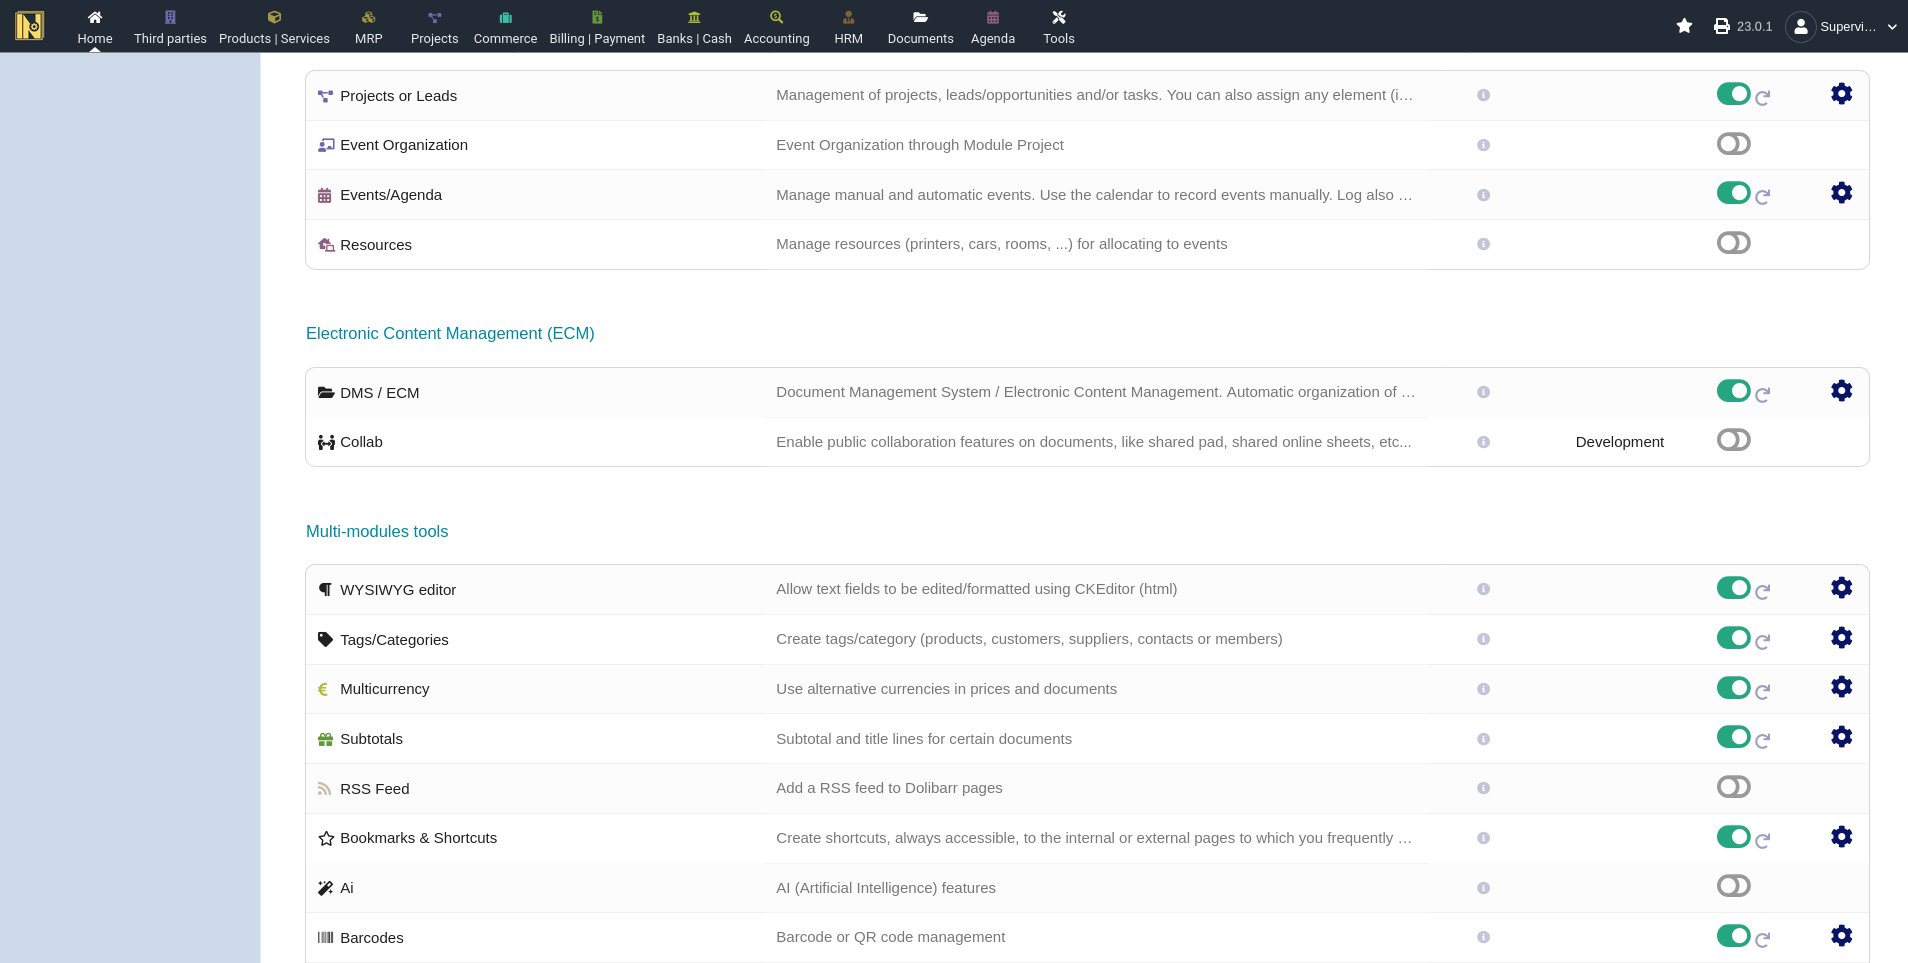
Before installing the KSeF module, make sure the following Dolibarr modules are enabled (Home -> Setup -> Modules/Applications):
Invoices - obviously required
Barcode - needed for QR code generation on PDFs
Multicurrency - required for foreign currency invoices (EUR/USD/etc) and NBP exchange rate handling.
Configure Your Company
Go to Home -> Setup -> Company/Organization and fill in
Company name and address - these appear on invoices sent to KSeF
Country - Must be set to Poland (Otherwise why are you using KSeF?)
NIP - This goes in the Professional ID 1 field (the module will relabel it to NIP once you apply translation overrides, more on that below)
VAT Number - if you have an EU VAT ID, stored in the VAT field
KRS/REGON/BDO/EORI - optional but worth filling in, these go into Professional ID 2, 3, 4, and 5 respectively. EORI is only relevant if you do EU customs operations.
If you want to re-arrange what data is stored in what field (e.g. storing NIP in professional ID 3), the module can remap them (see Advanced Configuration below)

Set up your Third Parties
Every customer and supplier in Dolibarr should have
Country Set Correctly - the module uses the third party's country to determine how to identify the buyer in the KSeF XML. Polish buyers are identified by NIP, EU buyers by EU VAT number, and non-EU buyers by their foreign tax ID. Always set the country!
NIP or VAT number - Polish customers need their NIP filled in, and EU customers need their VAT number
Address - You should include the address information as well for the purposes of invoicing
If you're migrating from another ERP system and have many third parties without countries set, the module will infer the country from the VAT-ID prefix (e.g. "DE" from "DE123456789") and otherwise defaults to Poland, but it's worth cleaning up your data to reduce the chance of any issues.
KSeF Portal and Credentials
Environments
KSeF has three separate environments, each with its own portal and credentials:
Test - for learning the system - use fictional company data and log in without special credentials and submit fictional invoices. Invoices have no legal significance
Demo - for testing with your real company data and real credentials to submit fictional invoices, but invoices still have no legal significance.
Production - real invoices with legal significance. Submissions cannot be reversed - in the event of an error you must submit a correction.
Important: Each environment has its own separate credentials. A token or certificate generated in the Demo portal will not work in Production, and vice versa. When you're ready to go live, you'll need fresh credentials from the Production portal.
Authentication: Tokens vs Certificates
You have two options for authenticating with KSeF:
Tokens are simpler to set up - log into the KSeF portal with a qualified seal or signature, generate an authorization token, and paste it into the module settings. Token validity is current set through the end of 2026 but it may be extended as the system matures.
Certificates - There are two types - online and offline certificates. You will need at least the offline certificate to issue offline invoices during KSeF outages, and if you store an online certificate then you can use this instead of token authentication.
For getting started, a token is the fastest path. You can switch to certificates at a later time. Additionally, tokens have configurable permissions and may be more secure if you do not have full ownership over the installation.
Getting your Credentials
1. Go to the KSeF portal for your chosen environment
Test: https://ap-test.ksef.mf.gov.pl/web/
Demo: https://ap-demo.ksef.mf.gov.pl/web/
Production: https://ap.ksef.mf.gov.pl/web/
2. Log in with one of the authentication methods
3. Generate an authorization token (for token authentication) or a certificate (for certificate authorization).
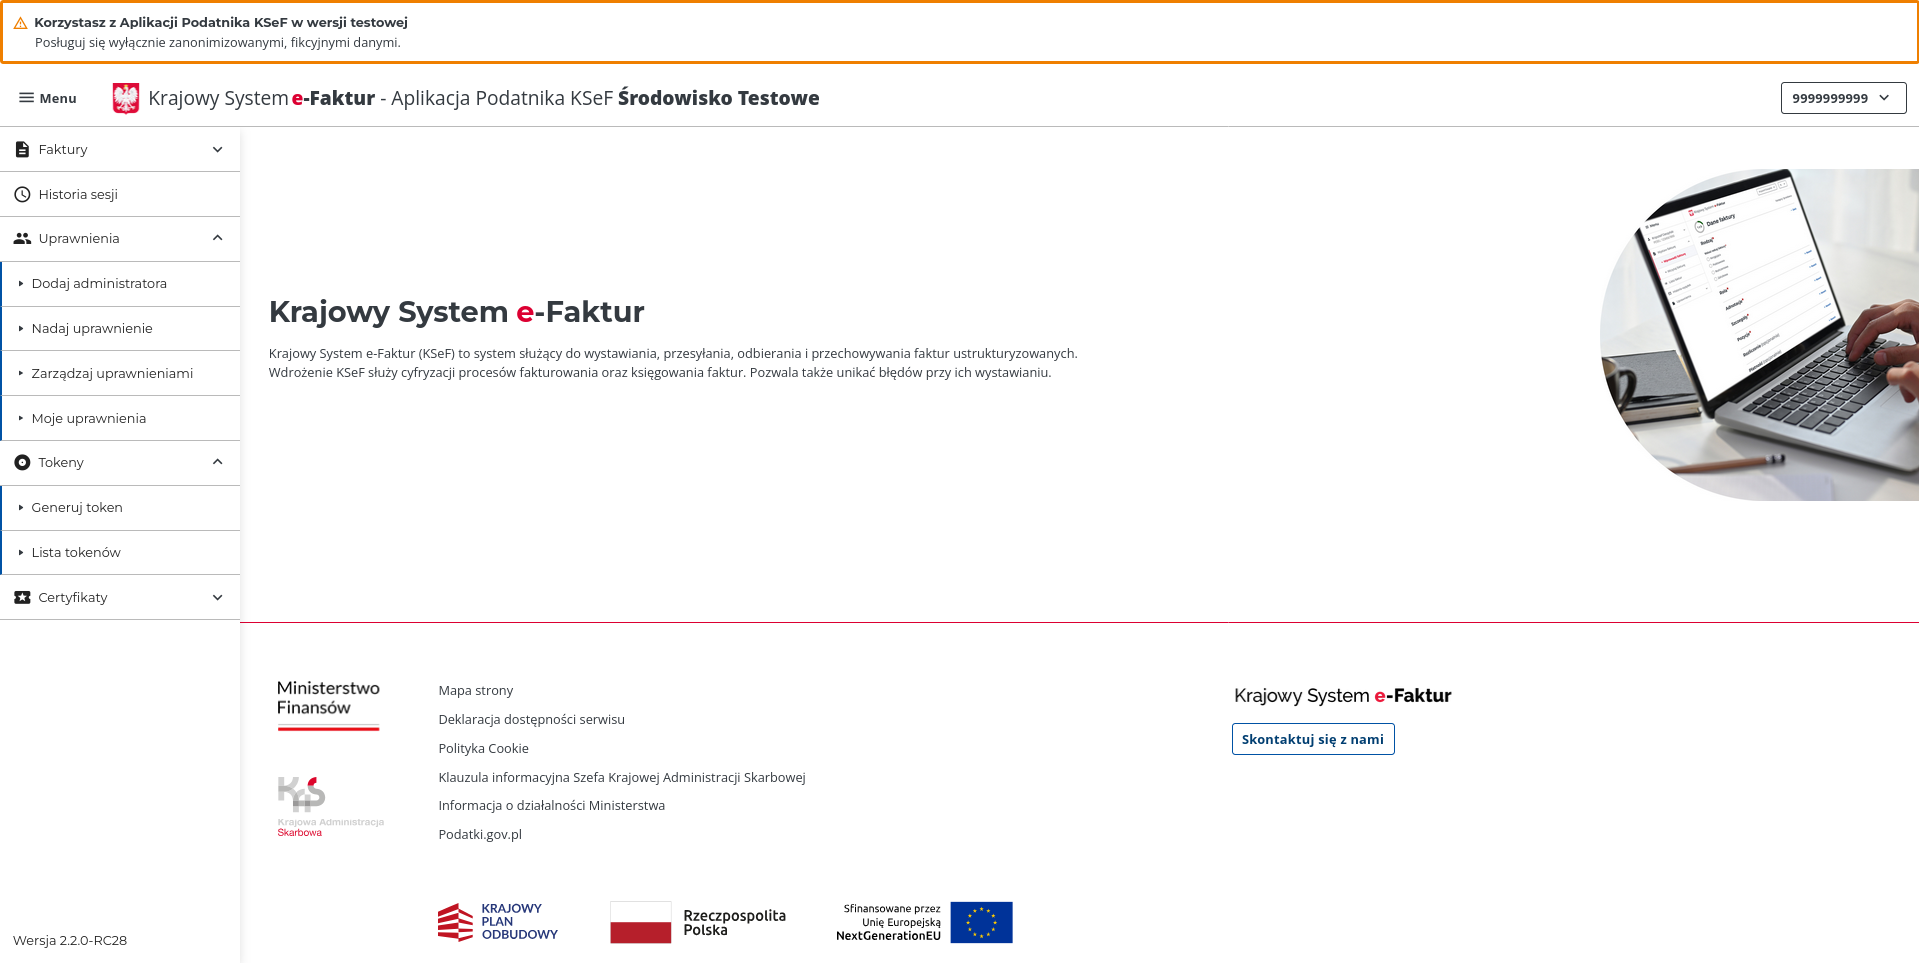
Permissions - the #1 Gotcha
After generating your token or registering your certificate, you also need to configure your permissions (Uprawnienia) in the KSeF portal. This is the most common source of authentication failures and trips up almost everyone on their first use of the KSeF system.
If you have a legal entity business, such as SPZOO, you will also need to ensure you have submitted the appropriate ZAW-FA form to the Tax Office to give initial permissions for someone on behalf of the company, otherwise you will not be able to log in and give permissions in the first place.
Go to the "Uprawnienia" section in the KSeF application and make sure your have given sufficient permissions to upload and download invoices. If you receive HTTP 403 errors when submitting invoices and have verified that you are using proper certificates for the environment, it is likely this permissions issue!
Installing the KSeF Module for Dolibarr
1. Download the latest module ZIP from the GitHub Releases Page
2. In Dolibarr, go to Home -> Setup -> Modules/Applications
3. Select the "Deploy/Install external module" tab
4. Upload the module's ZIP file
5. A popup will confirm success and you will see the KSeF module in the list of modules
6. Enable it and you can begin configuration

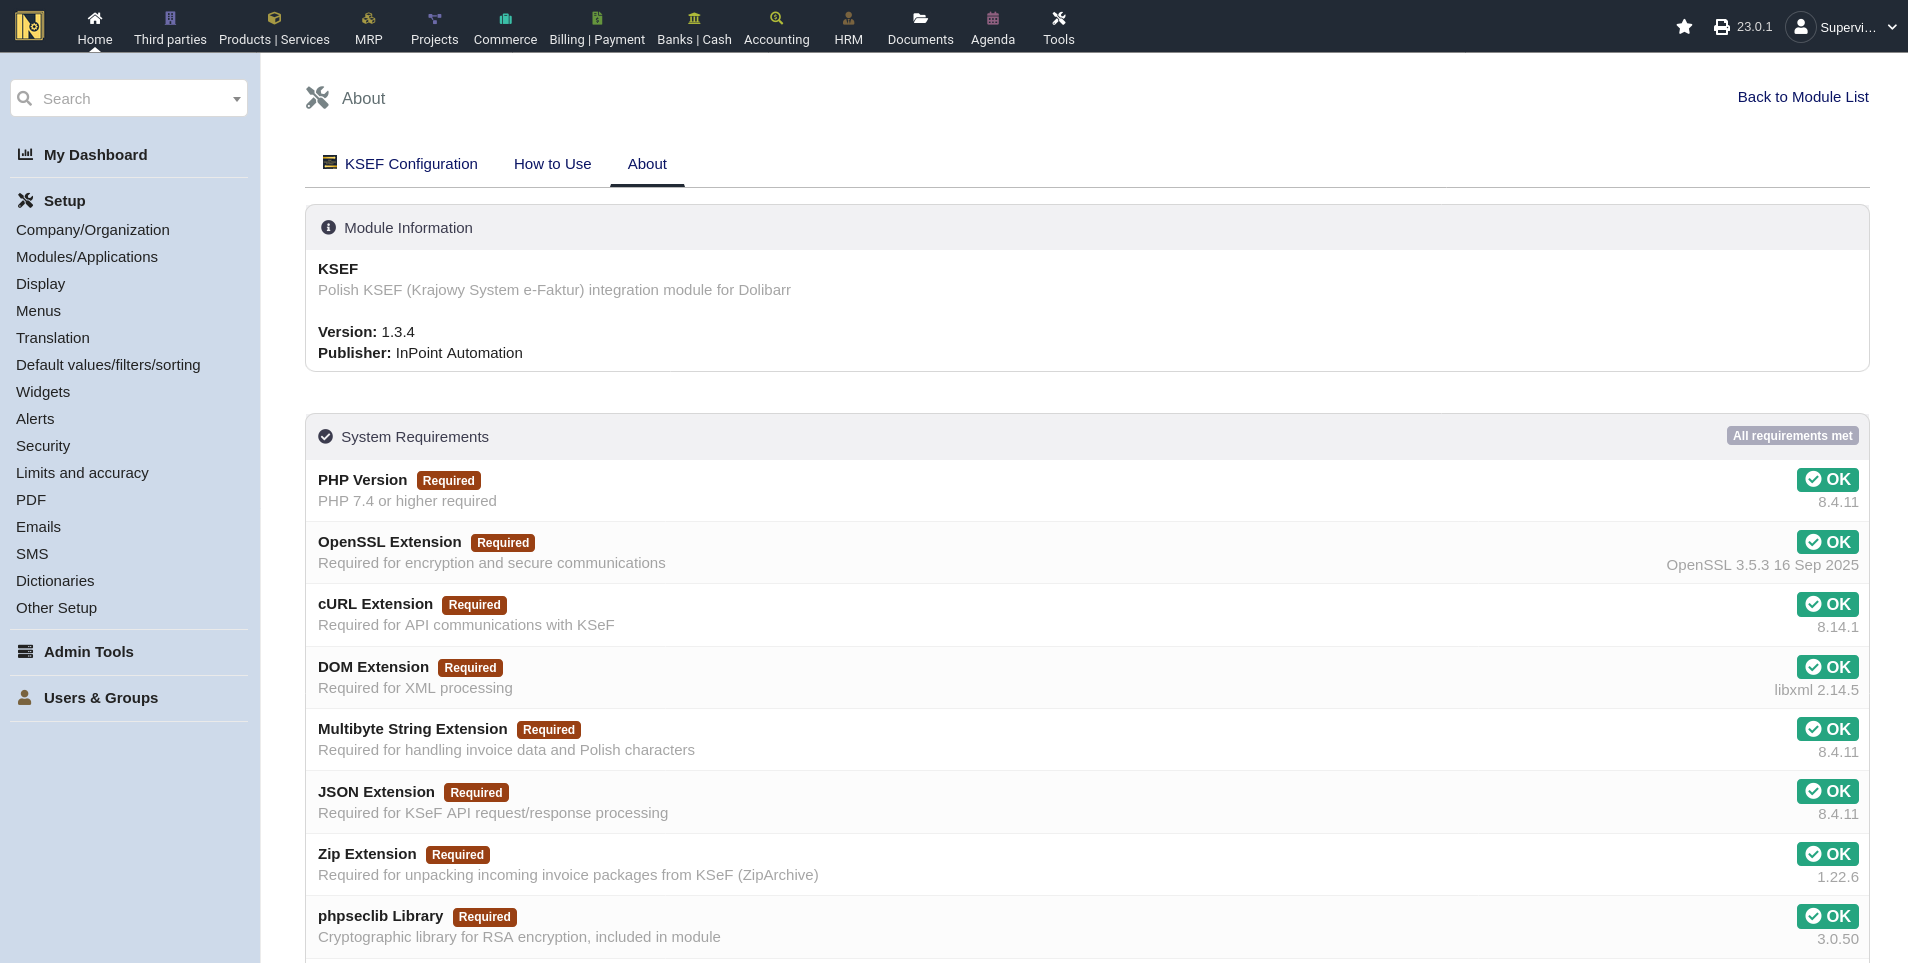
After enabling the module, you'll see a KSeF tab on invoices and new menu entries for incoming invoices and submission status.
Verify your setup: The modules "About" tab has a built-in system requirements checker that shows green/red status for every dependency. If something is red here, address it before going further!
After Updating: When updating to a new version, it is a good practice to disable and re-enable the module for certain changes to take effect. This allows database migrations which may be required in future updates to properly run. Your configuration (tokens, certificates, settings) are preserved through this process by default. There's also a setting to wipe everything on disable if you want a clean start, but this is off by default. See Automation and Extra Features for more on the update procedure.
User Permissions
The module registers two permissions you can assign through Dolibarr's permission system (Home -> Setup -> Users and Groups)
Read KSeF submissions - view the KSeF tab on invoices, the incoming invoices list, and status pages
Create/Update KSeF submissions - submit invoices to KSeF, sync incoming invoices, and perform imports
Module Configuration (settings/tokens/certificates) is restricted to admin users always. If you have multiple users, assign the KSeF permissions after enabling the module, as new permissions are not automatically granted to existing users.
Module Configuration
Go to Home -> Setup -> Modules -> KSeF and click the gear icon next to the module. The settings are organized into four tabs - General, Authentication, Outgoing Invoices, and Incoming Invoices - plus the How to Use and About tabs. We'll walk through each tab below. Less common options are covered in the Advanced Configuration section.
General Tab
Basic Configuration
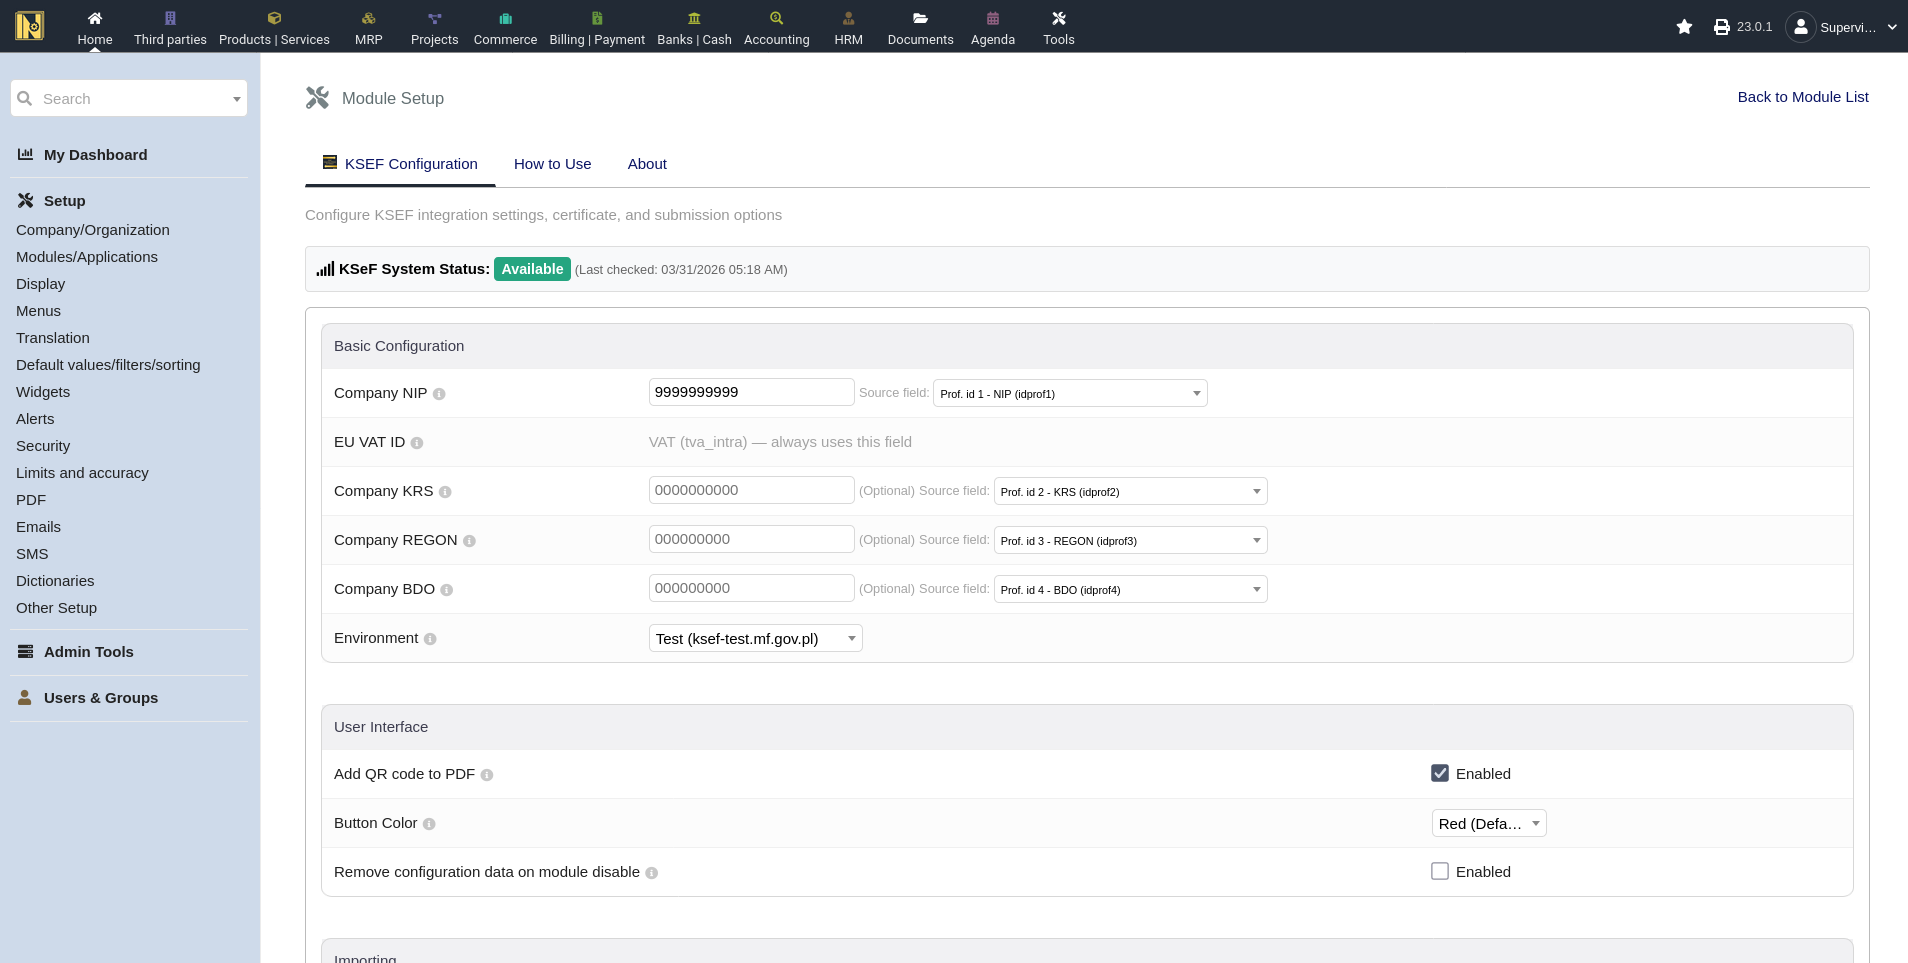
On the General tab:
Company NIP - auto-populated from your company settings. By default, it reads from Professional ID 1, which is the standard location for NIP on Dolibarr installations. If your setup stores the NIP in a different field, there's a source field dropdown to change this (See Advanced Configuration)
EU VAT ID - always read from the VAT field (tva_intra in Dolibarr) and can't be changed
KRS/REGON/BDO/EORI - optional and included in outgoing invoice XML if these are filled in. Each uses a configurable source field just like Company NIP (defaults: Professional ID 2/3/4/5). EORI is the EU customs/trade identifier and is only relevant for EU customs operations.
Environment - select Test, Demo, or Production. A warning appears if you select production as a reminder that invoices submitted are legally binding
User Interface Settings
Add QR Code to PDF - when enabled, accepted invoices get a verification QR on standard Dolibarr PDFs. Requires the Barcode module.
Button Color - allows you to change the color of the action button on invoice pages - default is red.
Remove Configuration Data on Module Disable - when enabled, almost all settings are wiped when disabling the module. Default is off.
VAT Rate Codes
The General tab includes a VAT Dictionary Helper. KSeF uses specific codes to distinguish the different kinds of 0% VAT - exempt, reverse charge, not-subject, intra-EU delivery, and export. The module auto-creates these entries in Dolibarr's VAT rate dictionary the first time it activates, but they're disabled by default to keep the invoice VAT dropdown clean. Enable only the codes your business actually needs:
ZW - VAT exempt (zwolniony) - medical/dental, educational, financial, small-business (art. 113)
RC - reverse charge (art. 17)
NP - not subject, supply outside Poland's territory
NP2 - not subject, intra-EU services (art. 100)
WDT - intra-EU delivery of goods (when auto-detection isn't enough)
EX - export of goods (when auto-detection isn't enough)
When creating invoice lines, pick the matching VAT rate from the dropdown (for example a dental practice uses 0% (ZW) for exempt services). If you need a code that isn't listed, add it under Home -> Setup -> Dictionaries -> VAT Rates.
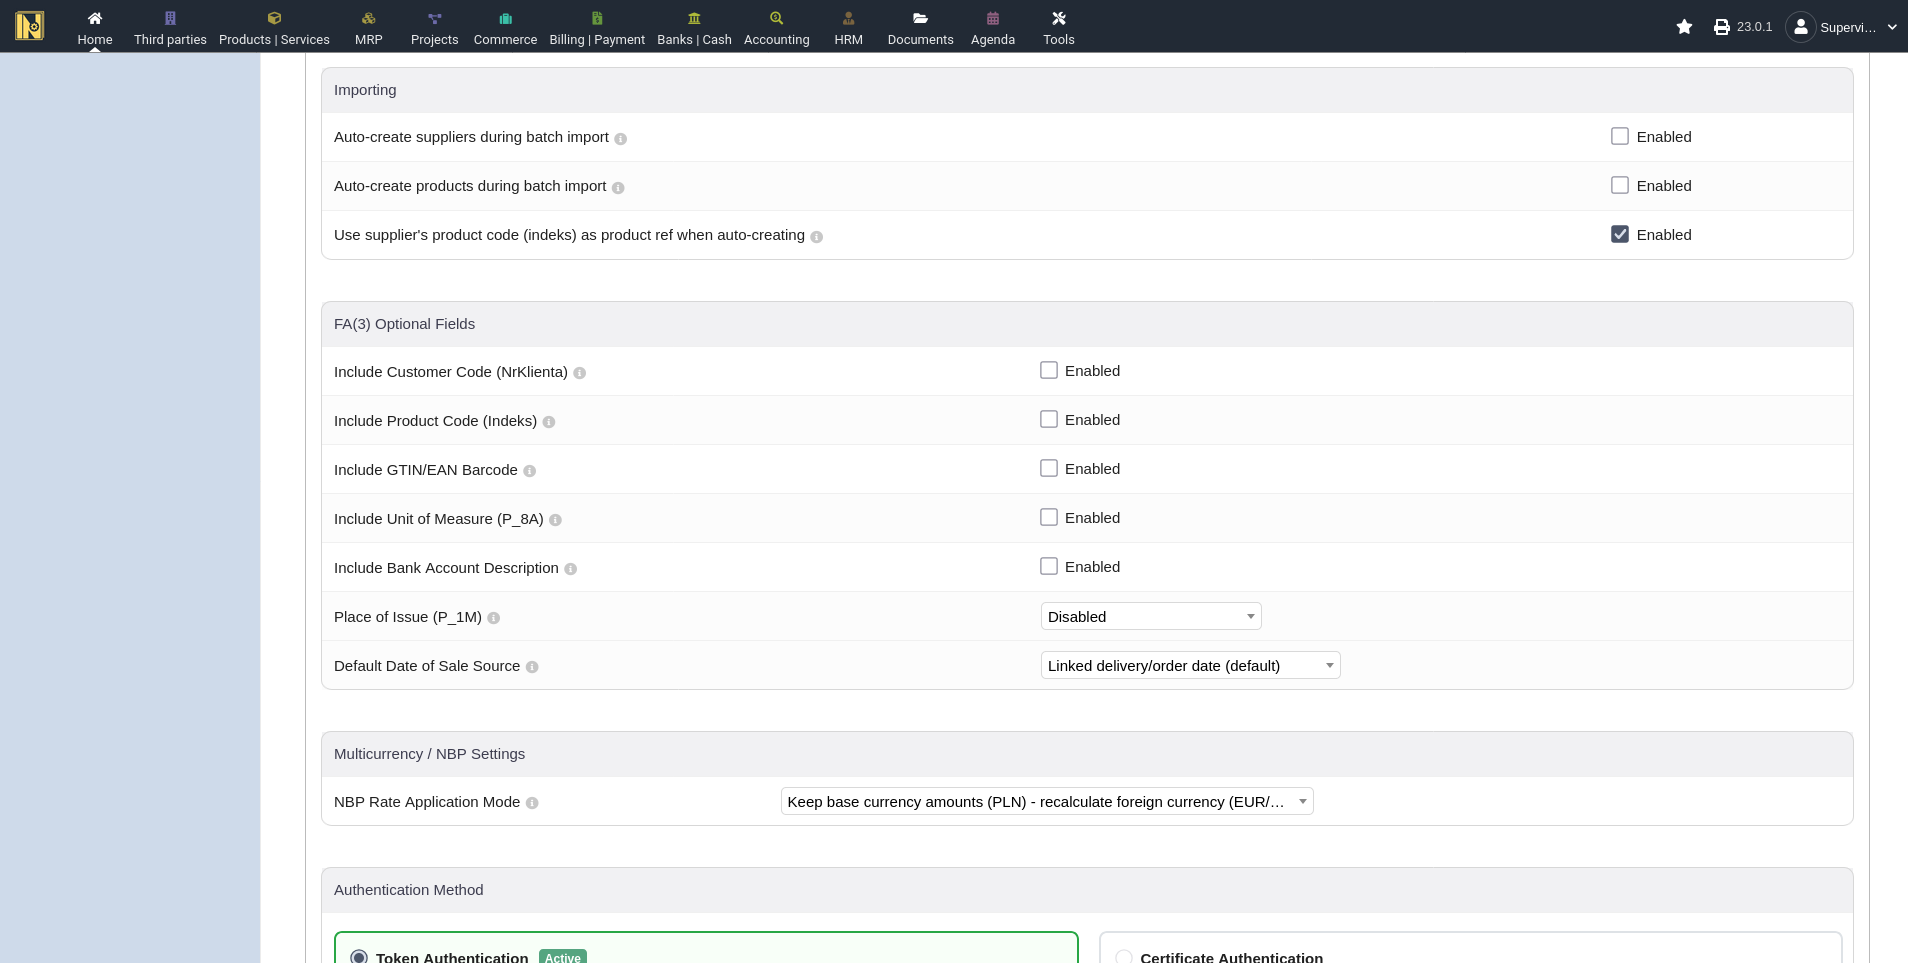
Multicurrency / NBP Settings
NBP Rate Application Mode
when foreign currency invoices are converted using the NBP exchange rate, there's often a small difference between Dolibarr's stored exchange rate and the the valid NBP exchange rate amounts. This setting controls which side is preserved when there is such a change
Keep Base Currency - the PLN amount does not change, and the foreign currency amount is recalculated based on the current exchange rate
Keep Foreign Currency - the foreign currency amount does not change, and the PLN amount is recalculated base on the current exchange rate
For more on how this works in practice, see the Foreign Currency Invoices section in Sending Invoices.
Translation Overrides

By default, Dolibarr doesn't show all professional ID fields. The module can override these so that NIP, KRS, REGON, and BDO display correctly on third party cards and throughout the interface so that it is easy to keep things consistent. It does this by updating the Translation Overrides fields based on what settings you have configured in the field settings at the top of the page.
Select the languages you want (currently en_US and pl_PL) and click "Apply Translation Overrides". You only need to do this once unless you change the field mappings above. If you need to undo these overrides for some reason, click "Remove Translation Overrides" and it will remove these changes from the overrides table.
Authentication Tab
Authentication Method

Authentication lives on its own Authentication tab, and each environment (Test, Demo, Production) stores its own token and certificate - switching environments uses that environment's saved credentials automatically.
Choose between token or certificate authentication. The active method is highlighted. If you haven't configured a certificate yet, that option is disabled with a note explaining what's needed
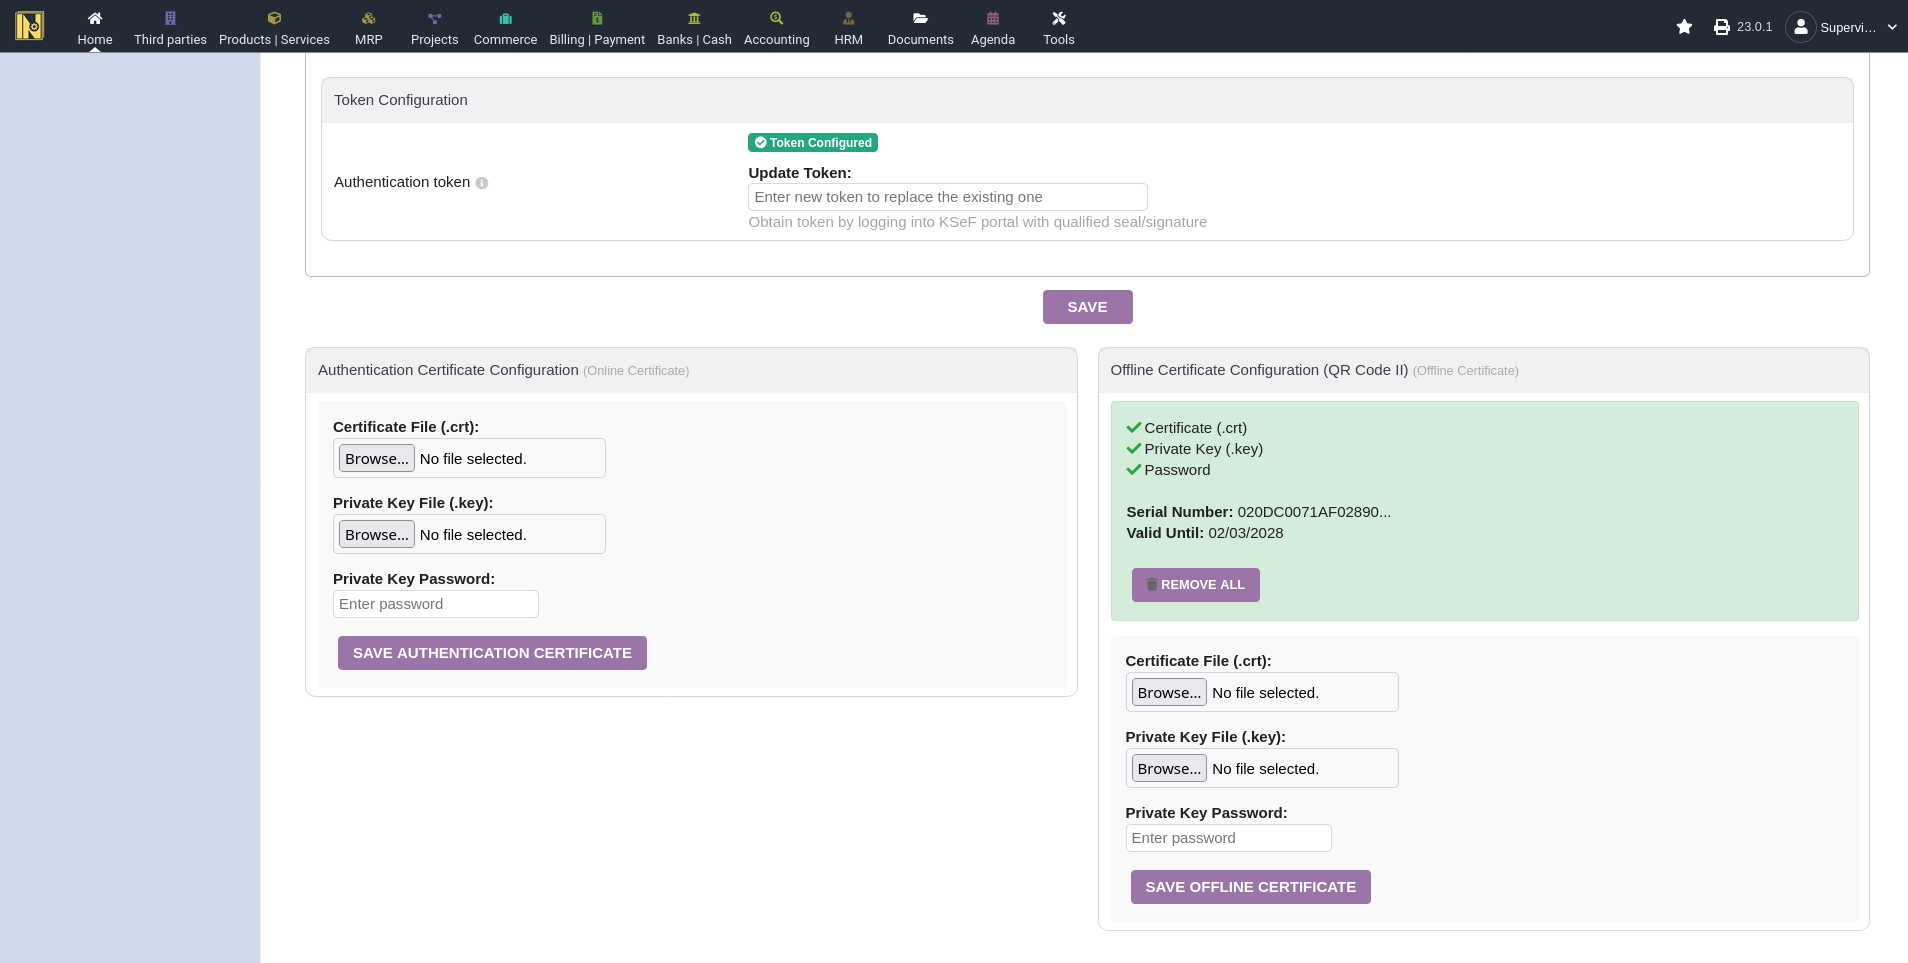
Token Configuration - paste your authorization token from the KSeF portal. The token is stored securely and is shown as "Token Configured" after saving and cannot be seen again.
Certificate Configuration - upload your certificate (.crt file) and private key (.key file) and enter the password, then click save. Do these one at a time. If there is an issue, it will be explained in the popup window. It is also possible to accidentally upload the offline invoice to the online and vice versa, so if accessing KSeF results in an error about the wrong certificate type, this is likely what happened.
Auto-selection - if you have configured only one authentication method, the module uses it automatically. You only need to chose manually if both are configured.
Outgoing Invoices Tab
FA(3) Optional Fields
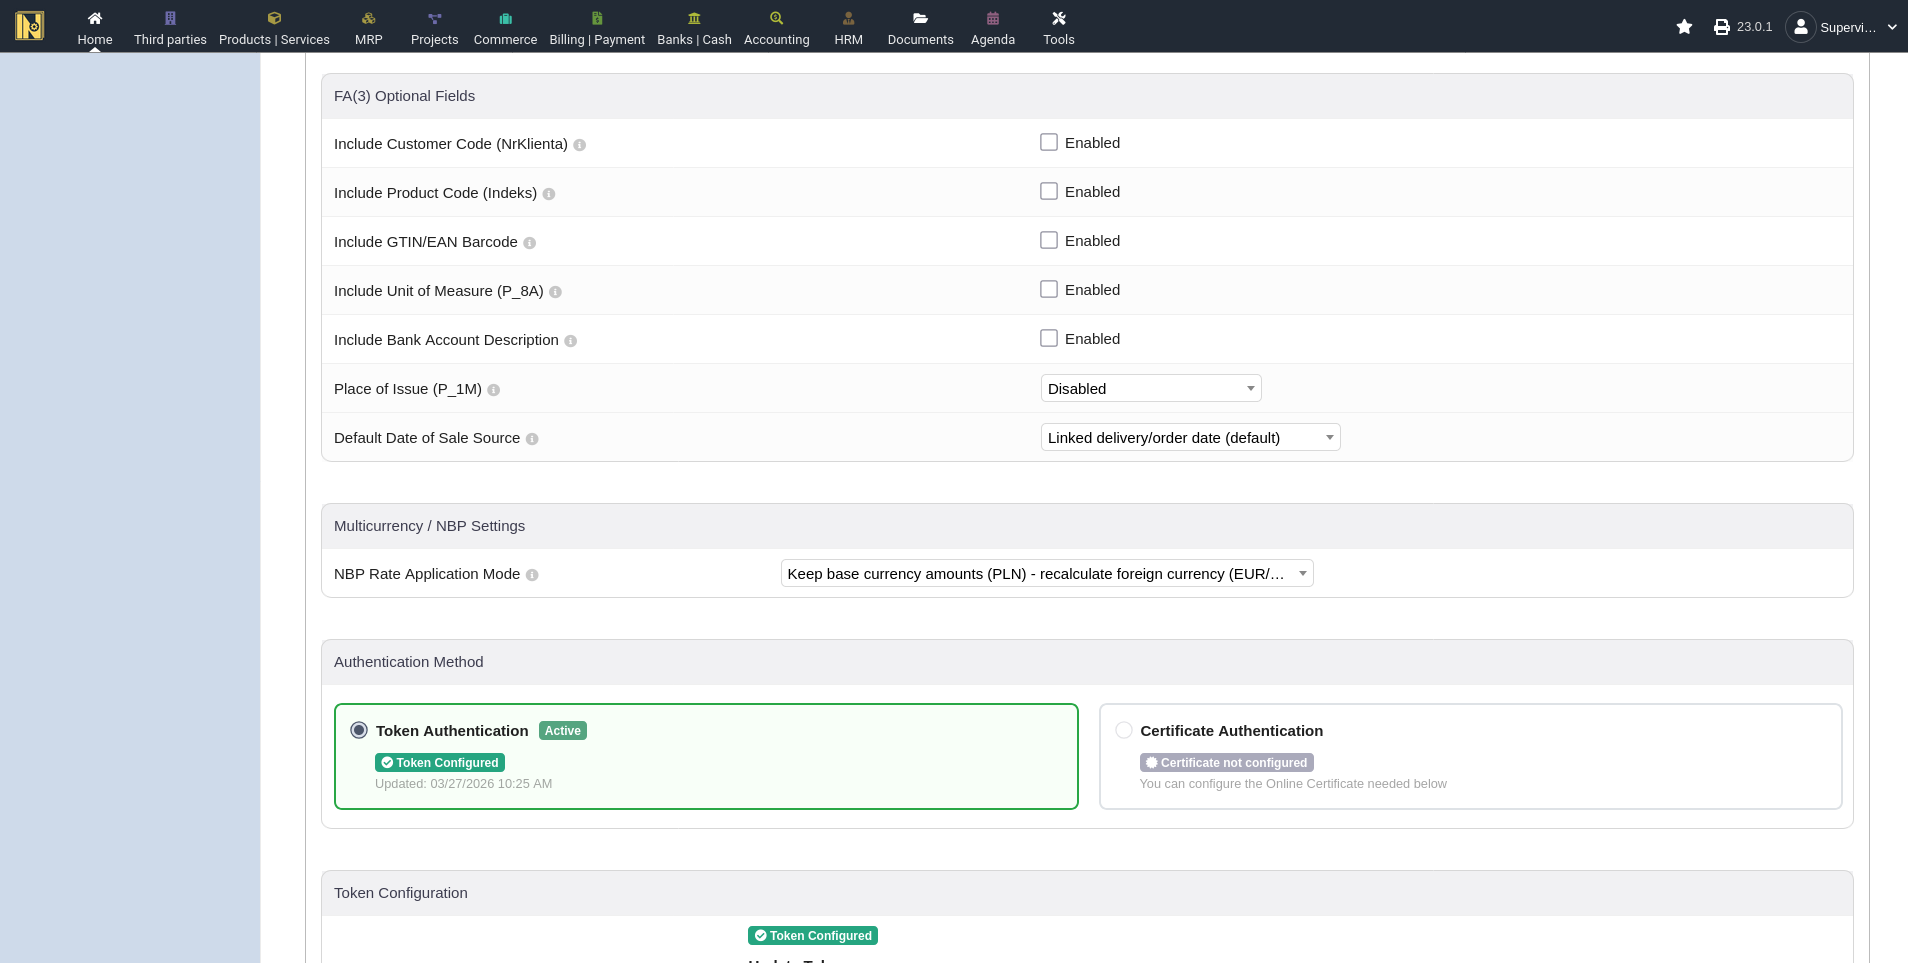
These control optional data included in the KSeF invoice XML. Enable them based on what data you actually have in Dolibarr. turning on GTIN when your barcodes aren't valid GTIN/EAN codes will cause validation failures.
Customer Code (NrKlienta) - includes the Dolibarr customer code
Product Code (Indeks) - includes the product reference in line items
GTIN/EAN Barcode - includes product barcodes as GTIN. Only enable if your barcodes are genuine GTIN/EAN codes, not internal codes
Unit of Measure- includes the unit of measure for products
Some bank-related fields are included automatically without a toggle. If your bank account in Dolibarr has a SWIFT/BIC code or bank name filled in, those always go into the invoice XML alongside the account number. Additional optional fields (bank account description, place of issue, date of sale source) are covered in Advanced Configuration below.
VAT-Exempt Invoices (ZW)
Issuing VAT-exempt invoices (code ZW) requires a legal basis for the exemption. There are two ways to set it, both on the Outgoing Invoices tab:
Global default (required) - under Optional Fields, find VAT Exemption Legal Basis, choose the basis type (Polish law is correct for most Polish exemptions), and enter the legal reference, e.g. art. 43 ust. 1 pkt 18 ustawy o VAT for medical/dental services.
Per-product override (optional) - for businesses with multiple exemption types, create a Products/Services extrafield (e.g. zwolnienie_podstawa) and map it in the module so each product can carry its own legal basis.
Invoice Notes and Custom Fields
The KSeF XML has a notes section that accepts up to 100 entries, each with a key and a value. The module can populate this from the invoice's public note and from any invoice custom fields (extrafields) you configure. Both are controlled from the "Invoice Notes and Custom Fields" section on the module setup page.
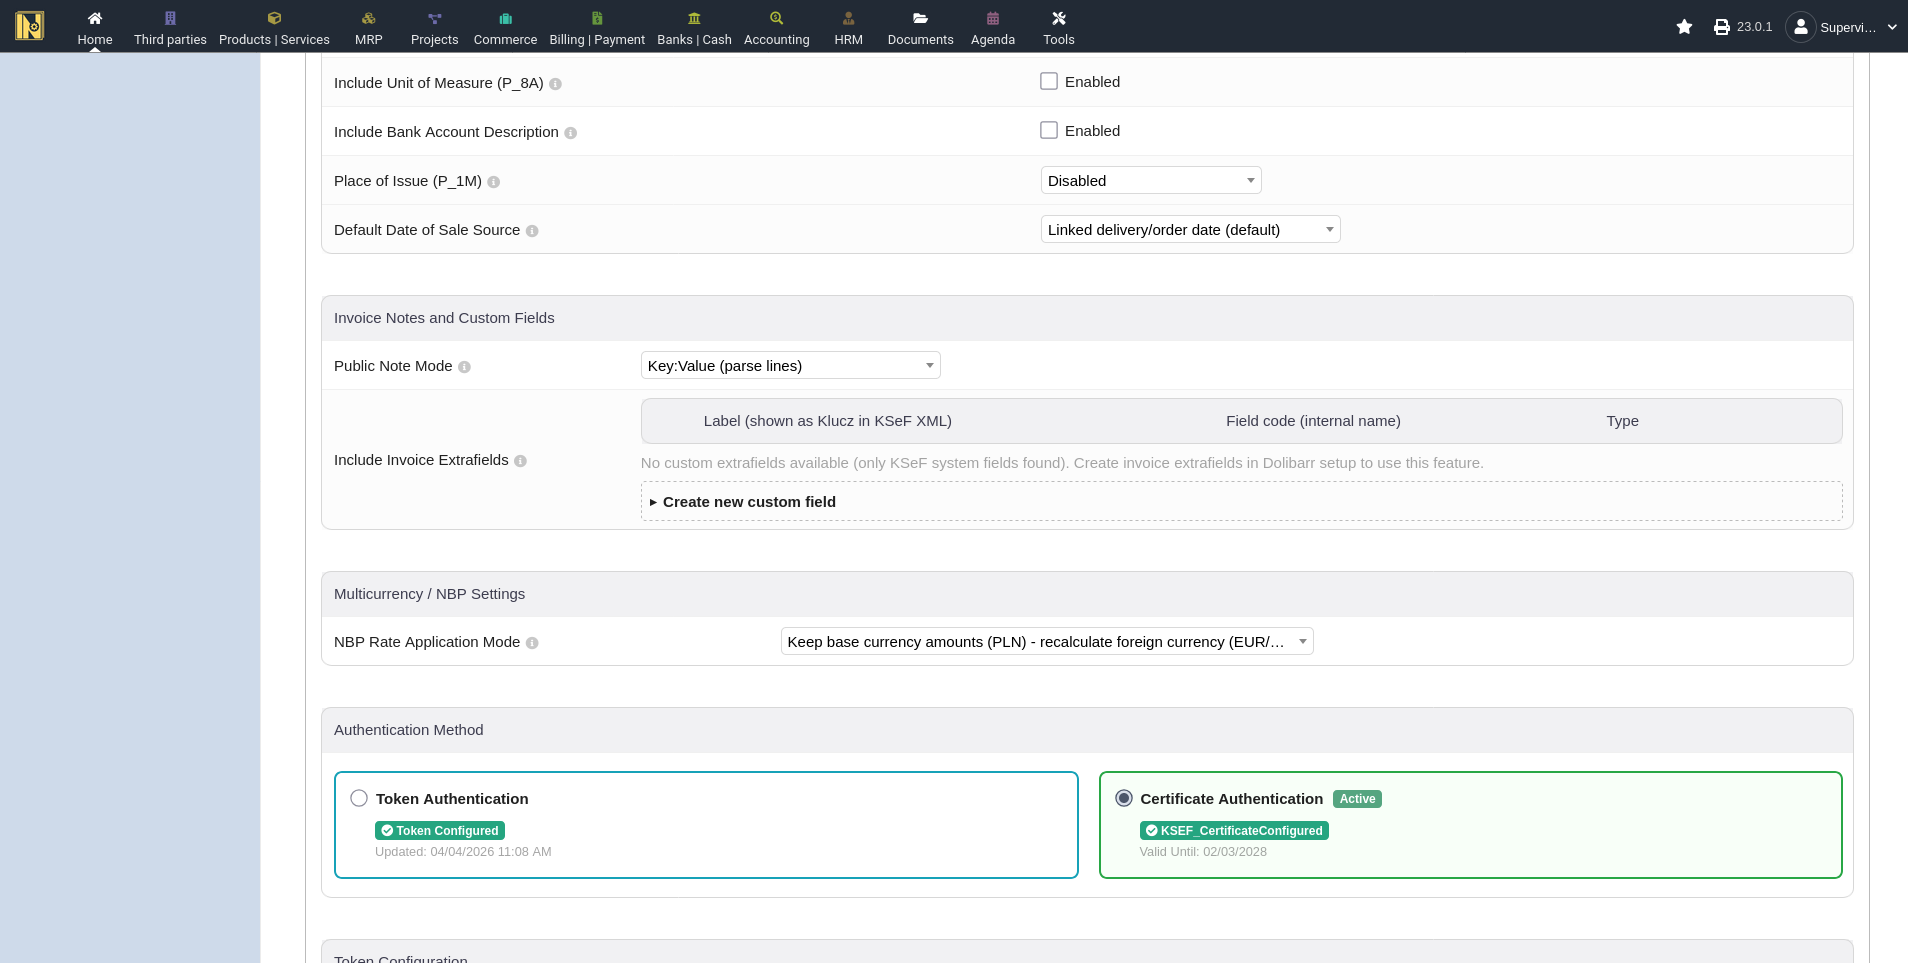
Public Note Mode: controls where and how the invoice's public note is included in the KSeF XML. There are four modes:
Simple - Stopka Faktury (the default): the whole note is sent as plain text in the invoice footer (StopkaFaktury).
Simple - Dodatkowy Opis: the note is sent as a single key-value entry with the key "Uwagi". If it's longer than 256 characters, it's split into numbered entries (Uwagi 1, Uwagi 2, ...) automatically.
Key:Value - Dodatkowy Opis: each line of the note is parsed at the first colon into a separate entry. Lines without a colon are skipped. Useful for structured metadata. Example:
Order number: ZAM/2026/001
Special instructions: Handle with care
Disabled: the public note is not included in the XML at all. Custom fields (below) are still sent.
Custom Fields: add invoice custom fields (Dolibarr extrafields) as additional entries. Each field's label becomes the entry key and the field value becomes the entry value. For Invoice, Third Party, and Project fields you choose a target - DodatkowyOpis (key-value pairs) or StopkaFaktury (appended as "Label: Value" footer text); Invoice Line and Product fields always go to DodatkowyOpis because they need line linking. Use the "Create new custom field" button to create a new extrafield directly from the setup page, or pick an existing invoice extrafield from the list. The pencil icon edits a field, the trash icon removes it from the KSeF inclusion list (it does not delete the extrafield itself).
Supported field types: text, long text, integer, decimal, date, date+time, and select.
Character Limits: keys and values are capped at 256 characters each. In Simple mode, longer public notes are split into numbered entries as described above. In Key:Value mode and for custom field values, anything beyond 256 characters is truncated.
The per-invoice workflow including the helper box, the preview panel, and the per-invoice mode override is covered in the Invoice Notes and Custom Fields section in Sending Invoices.
Footer Boilerplate, Order and Contract Numbers
The Outgoing Invoices tab also offers a few more optional fields:
Footer Boilerplate - a static text block (up to 3500 characters) that appears in every invoice's footer (StopkaFaktury). Use it for KRS registration details, legal disclaimers, or GDPR clauses. It isn't affected by per-invoice note overrides.
Order number (NrZamowienia) - sourced from the Customer Reference (ref_client, the default), a linked sales order number, or an invoice extrafield. Multiple linked orders produce multiple entries.
Contract number (NrUmowy) - from a third party extrafield (auto-fills from the customer) or an invoice extrafield (set manually per invoice).
Default payment settings - default payment terms, method, and bank account that pre-fill new invoices when the customer has no specific settings. Customer values and linked orders/proposals take priority.
Customer Exclusions
Customer Exclusions live on the Outgoing Invoices tab. Some customers don't need their invoices sent to KSeF, such as generic B2C customers, and more. Add them to the exclusion list here, or they can be excluded directly from their third party card. When a customer is excluded, the module-specific features used for KSeF don't appear on the page when invoicing them.
Incoming Invoices Tab
Importing Settings
These live on the Incoming Invoices tab. These control default behaviors when importing incoming invoices (for details on importing, see Receiving and Importing Invoices)
Auto-create suppliers during batch import - suppliers not matched to existing third parties are automatically created with data from the invoice
Auto-create products during batch import - unmatched products are automatically created. If disabled, unmatched lines are imported as free-text descriptions.
Use supplier's product code as product ref - when auto-creating products, use the suppliers code (indeks/P_7 field) as the product reference instead of Dolibarr's auto-numbering schema based on your Products module settings.
These defaults are remembered from your last batch import
Advanced Configuration
NIP Source Field Remapping - The "Source field" dropdown on the Company NIP controls which Dolibarr field the NIP is read from (default: Professional ID 1). The dropdown includes Professional ID 1 through 6 and the VAT Intra field, so the module can adapt to non-standard configurations where identifiers ended up in different fields. The same source field option is available for KRS, REGON, and BDO. If you map multiple identifiers to the same source field, the module warns you on save - this usually indicates a misconfiguration.
Bank Account Description - includes the bank account label in the payment section. Only enable if your account names are meaningful to external readers. The account number, SWIFT/BIC, and bank name are always included automatically - this toggle only controls the optional label field.
Place of Issue - optional city/location of invoice issuance. Can pull from company address or use a custom value.
Default Date of Sale Source - controls how the sale date is auto-populated. "Linked delivery/order date" prioritizes shipment date, then order delivery date, then order date, then invoice date. "Invoice date" always uses the invoice date. The module adds a "Date of Sale" extrafield to invoices that you can always override manually before submission.
Test Your Connection
Once everything is configured, verify it works before sending any invoices. On the settings page or the "How to Use" tab, you'll find test buttons:
Check KSeF Lighthouse - verifies the status of the KSeF API for any publicized outages or maintenance mode
Test Connection - verifies the module can reach the KSeF API for your selected environment
Test Token Authentication - verifies your token is valid and accepted
Test Certificate Authentication - verifies your certificate is valid (only available if a certificate is configured)
If you are missing token or certificate test buttons, you probably haven't configured them yet!
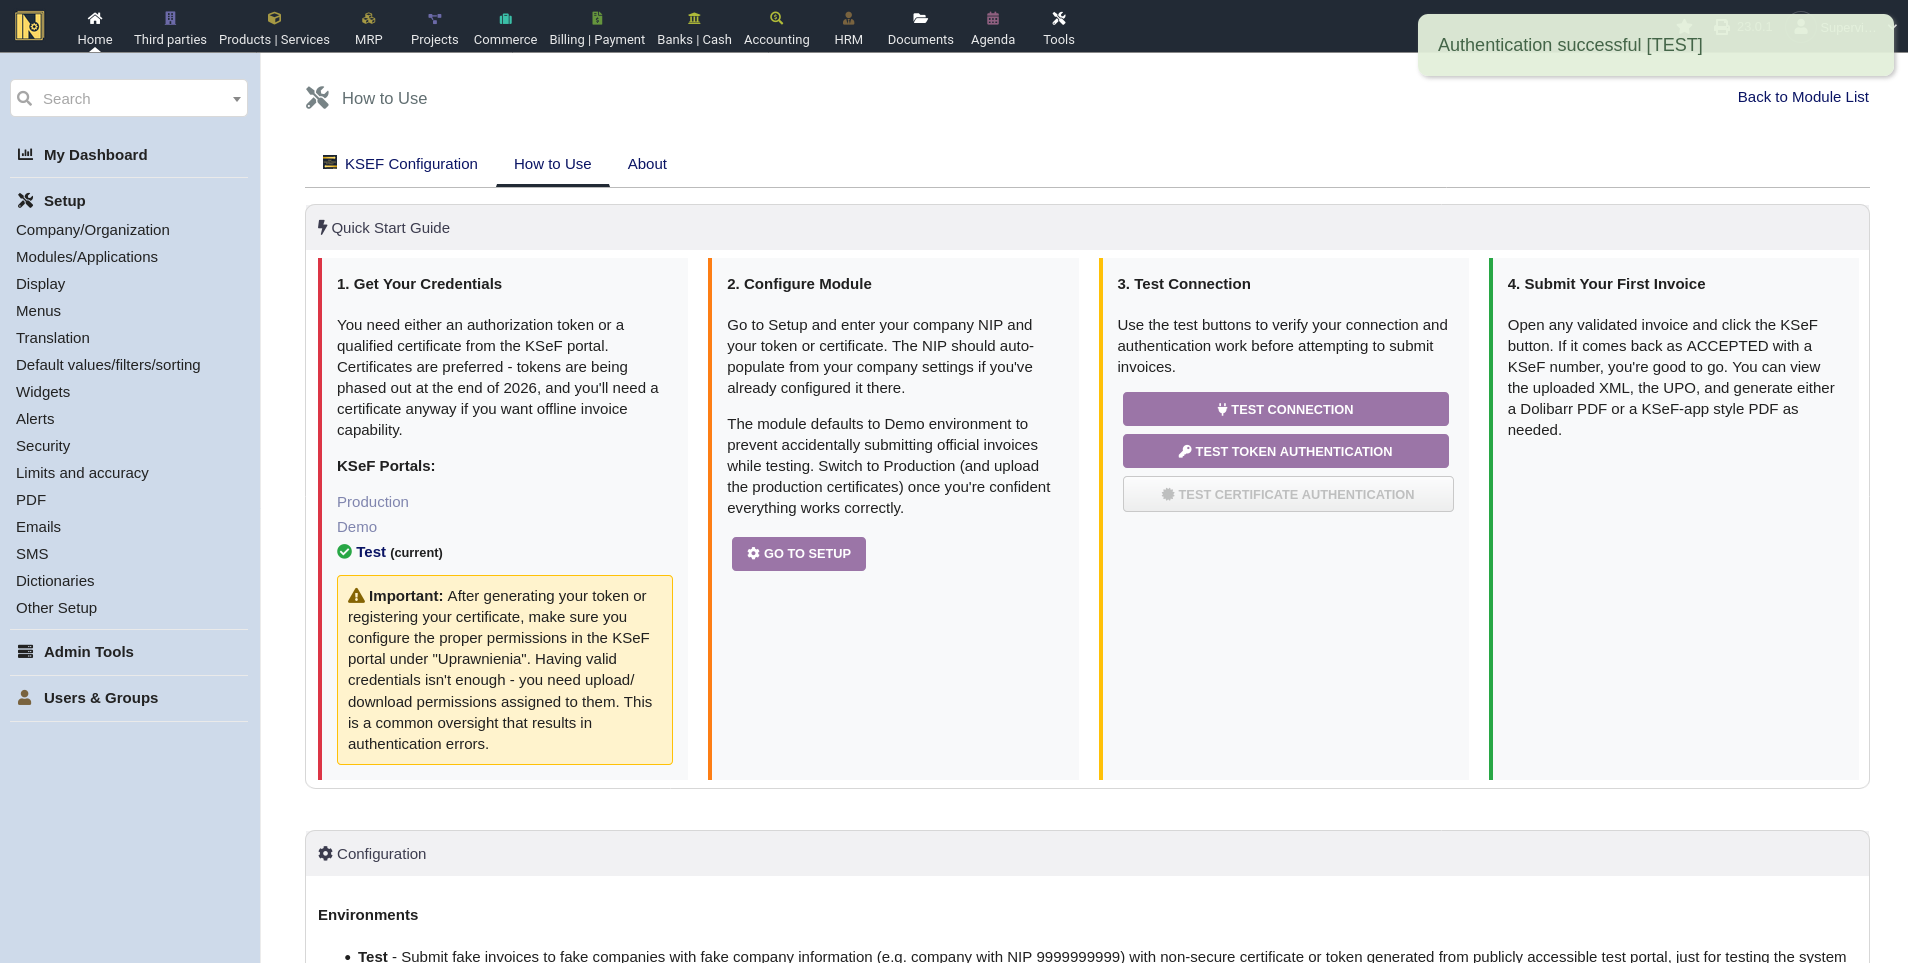
If the connection test passes but authentication fails, the issue is almost certainly permissions. Go back to the KSeF portal and check "Uprawnienia" - make sure your credentials have the required send and receive permissions.